Creating an eye-catching hero section for your website can be a game-changer in grabbing user attention. In this tutorial, we’ll guide you through the process of designing a dynamic hero section using Elementor and GSAP, without requiring any additional plugins. Follow along to elevate your web design skills!
Introduction
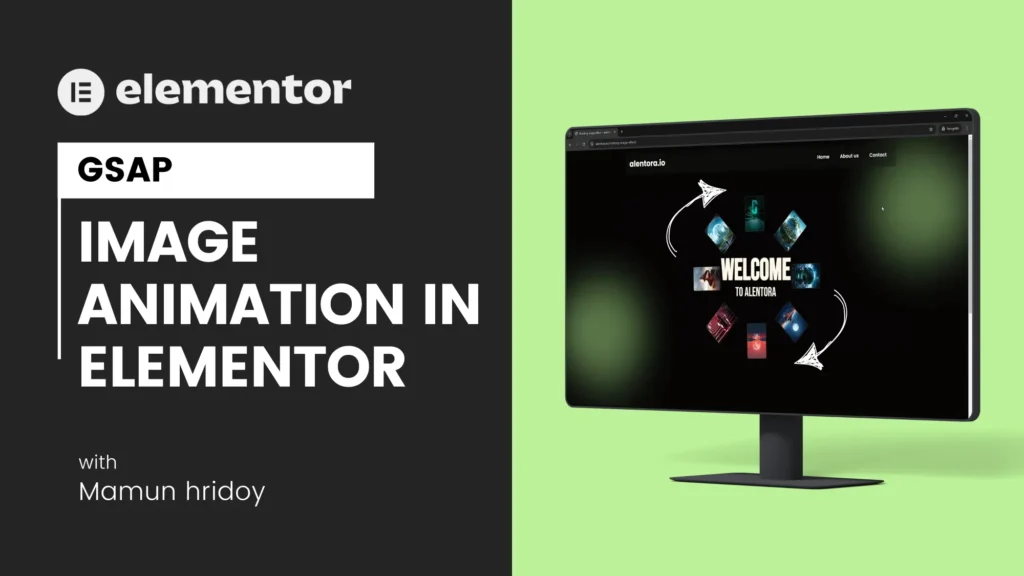
In this video tutorial, we demonstrate how to build a sleek, animated hero section using Elementor’s editor and GSAP (GreenSock Animation Platform). This method is simple, efficient, and highly customizable. By the end, you’ll have a responsive and visually appealing hero section ready to showcase your content.
Steps to Create the Hero Section
Setting Up the Containers
- Open the Elementor editor panel and create a new page.
- Add three containers to the page:
- Main Wrapper: Assign the CSS class
mdw-rotating-image-effectto this container. - Image Wrapper: Nest this container inside the Main Wrapper and assign the class
mdw-rotating-images. - Text Wrapper: Also nest this container inside the Main Wrapper and assign the class
mdw-rotating-image-content.
- Main Wrapper: Assign the CSS class
Configuring the Image Wrapper
- Set the height of the Image Wrapper container to
100vhto make it span the full viewport height. - Add your images to the Image Wrapper and style them:
- Border:
1px solid(choose a subtle color). - Width:
90px. - Height:
130px.
- Border:
- Center the images within the container by setting its alignment to center.
- Use
position: absolutefor precise placement and remove any default margins or paddings. - Duplicate the images as needed to create the desired effect.
Styling the Text Wrapper
- Add heading elements to the Text Wrapper for your content.
- Style the headings as desired. For example, use spans to create variations in font size or color.
- Set the width of the Text Wrapper container to
30%and align its position usingabsolutepositioning. - Make necessary adjustments for a polished look.
Adding GSAP Animation
- Insert an HTML element into the Main Wrapper container.
- Paste the GSAP code into the HTML element. This code will animate the images and text as desired.
- Assign the appropriate CSS classes to ensure the animations target the correct elements.
- Test the animations in the Elementor preview to confirm they work as expected.
Making the Section Responsive
- Adjust the image sizes and layout for different screen sizes using custom media queries in your CSS.
- Ensure the animation scales smoothly on mobile and tablet views by tweaking the GSAP parameters.
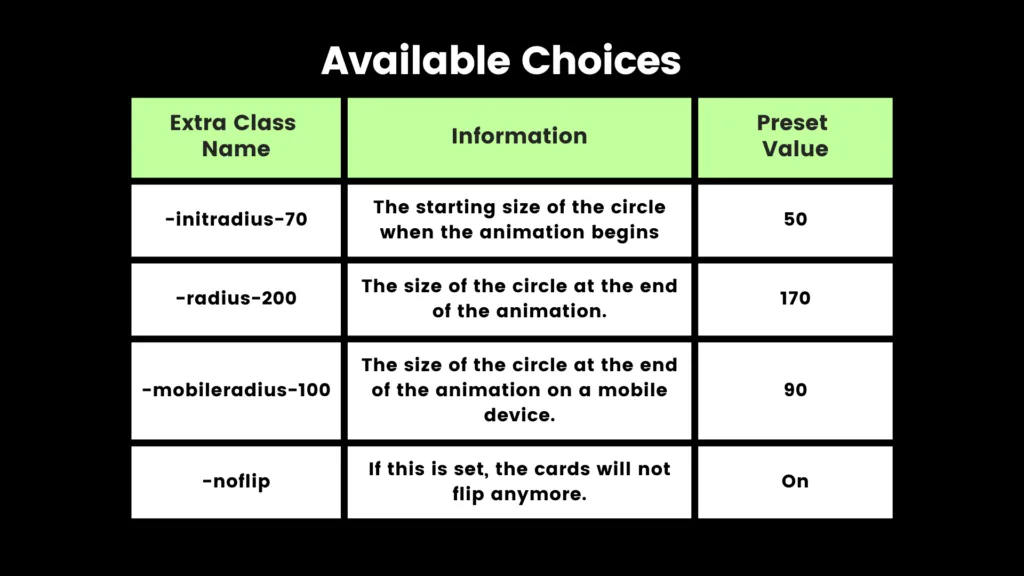
Advanced Customization
- To disable the flip animation, add the class
no-flipto the Main Wrapper container (mdw-rotating-image-effect). - For a larger image radius, use the class
radius-[value]. For example,radius-300will set a larger corner radius compared to the defaultradius-90. - Customize the animation duration and easing functions in the GSAP script for unique effects.
Conclusion
This dynamic hero section design using Elementor and GSAP is perfect for showcasing your skills or enhancing your website’s aesthetic appeal. The steps are straightforward and allow for endless customization to suit your brand’s style.
If you found this tutorial helpful, please subscribe to my channel and leave a comment with your thoughts. Let me know if you’d like more tutorials like this in the future. Happy designing!
All the required code snippets and resources are available in the video description or on my website. Check them out to get started!