If you’re looking to build a modern, eye-catching image slider for your WordPress website using Elementor Pro, you’re in the right place. In this tutorial, I’ll walk you through how to make a fully custom animated slider — without needing any third-party plugins.
We’ll use Elementor Pro, a bit of CSS, and a touch of JavaScript to bring everything to life. Don’t worry if you’re not a coding expert — I’ve kept everything super simple, and you can copy and paste the code directly from this post.
Let’s get started!
What You’re Going to Build
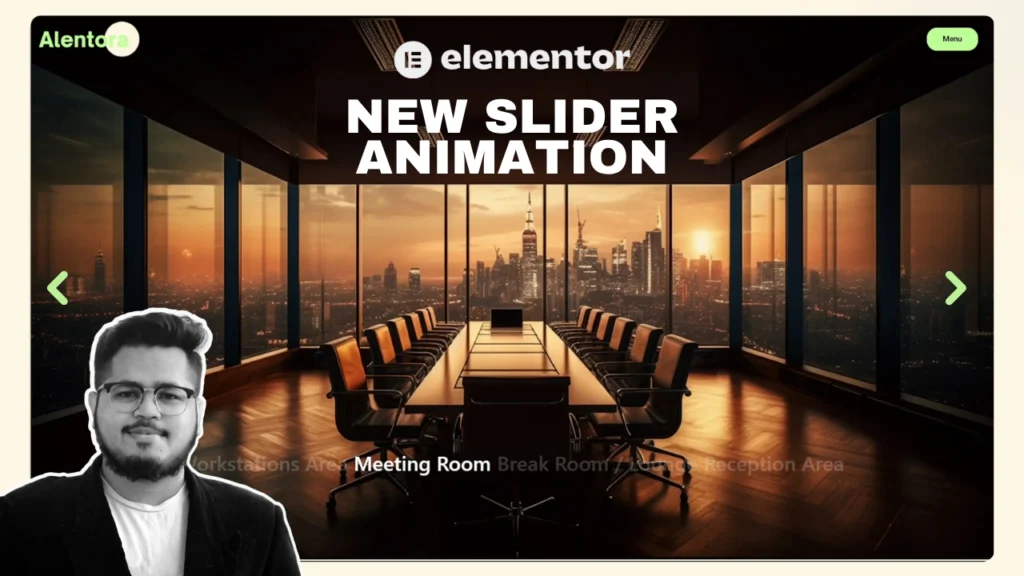
We’re going to build a horizontal slider that looks smooth, modern, and interactive. You’ll be able to slide between sections with stylish transitions. Even better? When you hover over the text, the entire slider will react — giving your visitors a high-end user experience.
This slider is perfect for creative portfolios, agency landing pages, or anyone who wants to make their website stand out.
Step 1: Set Up the Environment
First, make sure you’re using Elementor Pro — the free version doesn’t allow some of the advanced features we need here.
Open up the page where you want to insert the slider, and launch the Elementor editor.
Now add a container. Make it full-width and give it a height of 100vh (100% of the screen height). This will give your slider a nice fullscreen feel, which looks especially good on desktop layouts.
Step 2: Add the Slides
Inside your main container, add another inner container that will serve as your slider content area.
You can use basic image widgets or background images depending on your design preference. For my example, I used background images on containers for better control over spacing and layering.
Add four or five containers inside the main slider section — these will be your slides.
If you want text on each slide, feel free to drop in a Heading widget or Text Editor inside each one.
And if you’re building a stylish site header, you might also love our tutorial on how to create an animated menu in Elementor — it pairs beautifully with sliders like this.In my version, I kept the content simple and clean to keep the focus on the animation and transitions.
Step 3: Style the Slides
This part is all about getting the look right.
Set each slide to cover the full height of the container. If you’re using background images, set them to cover and position them center center. Turn off repeat and adjust any padding or margin so everything looks balanced.
If you’re including text, make sure it’s aligned properly. I recommend aligning to the left or center, depending on your design.
You can adjust the horizontal position in the layout settings to control how the content appears.
Step 4: Add Navigation (Dots, Not Arrows)
By default, Elementor sliders come with arrows and dots. In our case, we’ll remove the arrows and only keep the navigation dots.
You’ll do this in the slider settings. Set the transition type to “fade” and set the speed to 4000ms for a smoother feel. This will give your slider a calm, elegant transition effect rather than a fast sliding bounce.
Step 5: Add Custom CSS
Here’s where the fun begins.
You’ll need to paste some custom CSS into your page or slider settings. If you don’t know where to add it, just open the Elementor editor, click the gear icon in the bottom-left to access page settings, and then go to the Custom CSS tab.
Paste the CSS I’ve provided below the post. This code will handle the appearance of the dots, text positioning, font styles, spacing, and responsive tweaks.
Feel free to tweak values like font size, padding, and animation timing to match your brand or design vibe.
Step 6: Add the JavaScript (for Hover Interaction)
The final magic touch comes from a little JavaScript.
We’re going to use JavaScript to make the slider react when you hover over the text. This means when a user hovers over one of the labels or text links, the slider will shift to the corresponding slide smoothly.
To add this, drag an HTML widget to the bottom of your slider and paste the JavaScript code into it.
That’s it! No need to install a plugin or modify your theme files. Elementor Pro + a little code = a big visual upgrade.
Step 7: Customize It to Fit Your Style
Don’t forget — this is your slider. You can change the font by linking to any Google Font and updating it in the CSS. You can even control how much space exists between the dots or adjust how the text appears.
Want to add more slides? Just duplicate one of the slide containers and update the label and image.
If you add a new slide, remember to also update the CSS with the correct index (like :nth-child(5) if it’s the fifth slide) so the JavaScript can target it correctly.
Step 8: Make It Mobile Friendly
This slider works great on desktop, but you’ll want to make sure it’s also looking sharp on tablets and phones.
In Elementor, use the responsive mode switcher (bottom left corner) and test it on all screen sizes. You can adjust padding, font sizes, or even hide some animations if needed.
The CSS I’ve provided is already optimized to keep things centered and clean, but a quick mobile pass never hurts.
Where to Get the Code
I’ve made this easy for you.
You can download both the CSS and JavaScript code from this page. Just scroll down and grab the files. If you’re not sure where to put them, recheck Step 5 and Step 6 above.
If you get stuck or something doesn’t work quite right, don’t worry — just leave a comment below or reach out through the contact form. I’d love to help you get it working.
Final Thoughts
Building your own slider in Elementor might sound complicated at first, but once you go through the process, you’ll see how flexible and powerful Elementor really is.
By using a little code and a bit of creativity, you can design sliders that go far beyond basic carousels. The end result is a fully customized, animated slider that will wow your visitors and keep them engaged.
Give it a try — and don’t forget to have fun with it.
If you’re also customizing your navigation, check out our guide on making an animated menu in Elementor to keep the design consistent. That’s what web design is all about.
If you found this tutorial helpful, feel free to share it or link back. And if you create something cool using this method, I’d love to see it!
Happy building!